Keycloak authentication
At EcoAct, we prefer when our applications are responsible for both authentication and authorization (simpler given our small scale). But it happens from time to time when an app is not able to provide for these, especially when it has not been coded by us 😁.
A good example of this is jupyter notebooks, that in its basic form does not come (to the best of our knowledge) with a fine-grained authentication/authorization mechanism.
To circumvent this limitation, we use keycloak, alongside with the traefik forward-auth middleware.
Warning
here we clearly see the limits of the homemade approach. A managed jupyter service would be a judicious choice to consider 😊.
Setting up the keycloak stack
There is no sense in setting up locally keycloak, we thus just present the production setup.
All relevant information can be found in the docker-compose.keycloak.yml file (here).
You will need to create a .keycloak.env file
and setting for keycloak
DB_ADDR: should bedb(the postgresql database is used for keycloak)DB_VENDOR: should bePOSTGRESDB_DATABASE: name of the database insidedbDB_USER: the authorized user fordb(seePOSTGRES_USERin postgresql)DB_PASSWORD: password associated withDB_USER(seePOSTGRES_PASSWORDin postgresql)DB_SCHEMA: should bepublicKEYCLOAK_USER: username to accesss (with admin right) to keycloak web interfaceKEYCLOAK_PASSWORD: password associated withKEYCLOAK_USERPROXY_ADDRESS_FORWARDING: puttrue. This is required to run keycloak behind traefikkeycloak_url: entry to the DNS address you created in order to reach the keycloak web interface.KEYCLOAK_HOSTNAME: put the same value as inkeycloak_url
You can then launch for a first time
make keycloak-launch
Once in the keycloak web interface, pick admin console, you should be in the (default) realm called master. Create a new client like so

Create a new client

Create a secret key used to generate JWT tokens

Fill client settings (part 1)
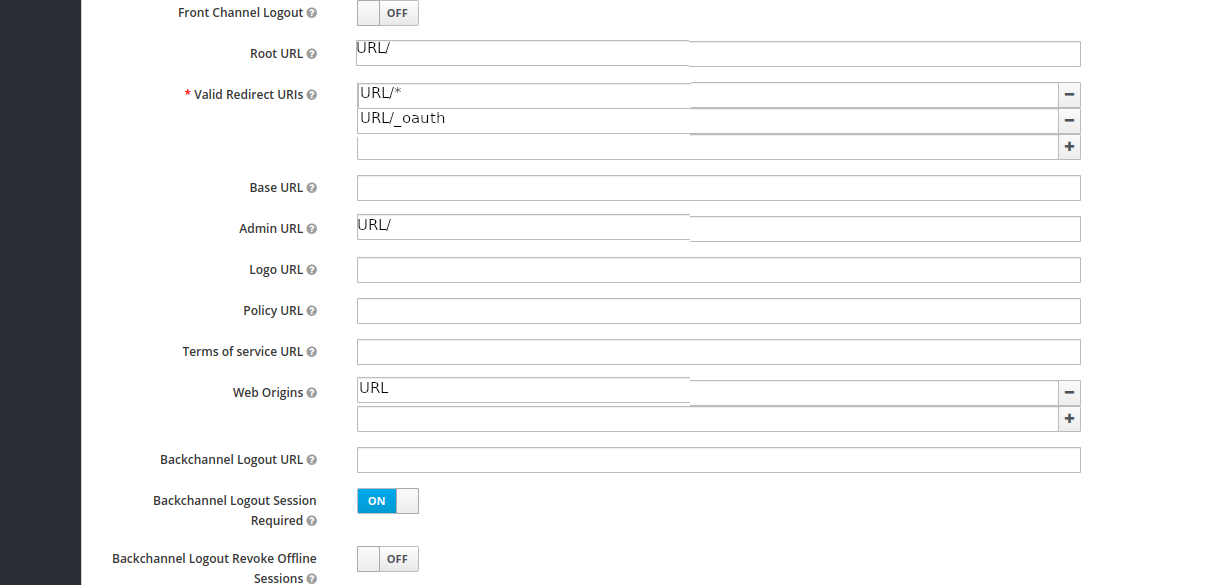
Fill client settings (part 2)
Then in the .keycloak.env, fill the needed traefik forward auth environment variables
PROVIDERS_OIDC_CLIENT_ID: see above screenshot (client/app to protect)DEFAULT_PROVIDER: putoidcSECRET: see above screenshotPROVIDERS_OIDC_CLIENT_SECRET: see above screenshot (same asSECRET)OIDC_ISSUER: see above screenshot and putURL/auth/realms/master.URLis the DNS address you created in order to reach the application you want to protect.PROVIDERS_OIDC_ISSUER_URL: same asOIDC_ISSUERAUTH_HOST: see above screenshot and putURL/_oauthCOOKIE_DOMAIN: the domain name ofURL(like lcabox.com for this very website)
In the stack of the app you want to protect, you will need to add in the labels section
- traefik.http.routers.jupyter-https.middlewares=traefik-forward-auth
Finally, you can stop and relaunch the app you want to protect and
make keycloak-launch
The app should be protected by keycloak! 😊